

Game-Changing Campervan Hacks, Tips and Gadgets
Building your own campervan is an exciting journey that offers freedom, flexibility, and the ability to create a home on wheels tailored to your needs. Whether you’re using it for weekend getaways or a full-time van life adventure, a well-thought-out build is essential for comfort, functionality, and efficiency. From selecting the right van to creature comforts and including all the features you want, there are key factors to consider to make your campervan both practical and enjoyable. In this post, I’ll share with you 9 tips, hacks or gadgets to change your campervan from average to awesome!
Tip 1 – Add a Shower
Imagine stepping into your van after a long day of adventure—you’re sweaty, dirty, and exhausted. All you want to do is crawl into bed, right? Wrong! You want a shower. You want to rinse off the grime, relax under hot water, and feel refreshed. Now, imagine having a shower right inside your van!
If you’re planning a van build, my number one tip is: include a shower. I’ll be honest—figuring out how to make it work was one of the most challenging parts of our build. It meant installing a fresh water tank large enough to support our family, setting up a reliable hot water system, managing grey water disposal, and, of course, finding the perfect spot to fit it all.
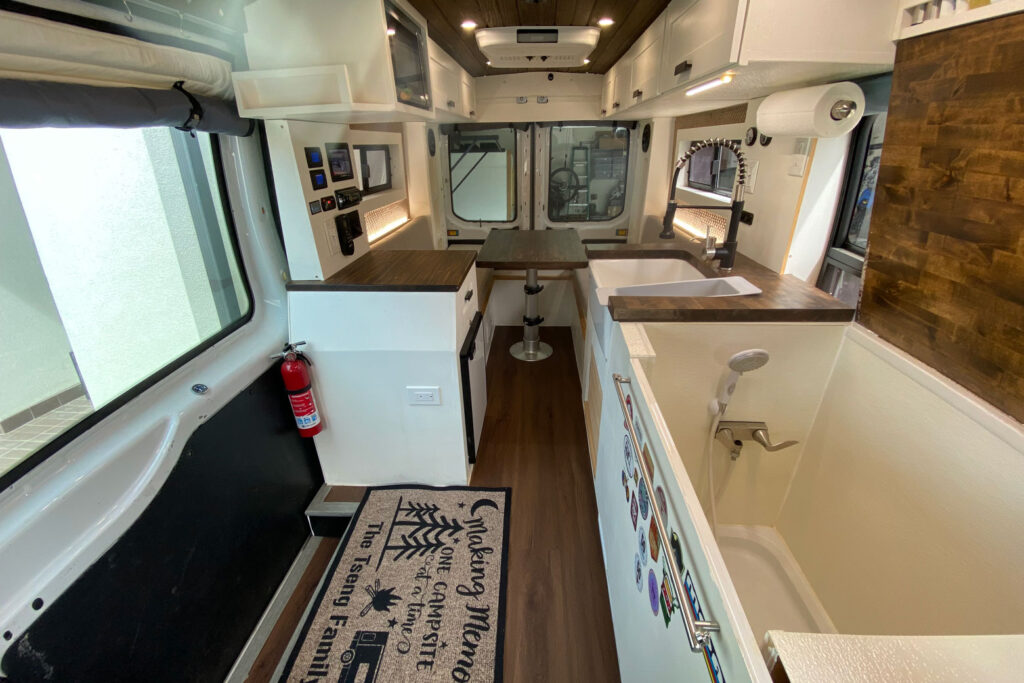
Our shower is built around this 32″ x 24″ shower pan. While we could hang shower curtains from the ceiling, we prefer to shower sitting down—no hassle with wet curtains, no water splashing everywhere. It might seem unusual at first, but once you get used to it, it’s incredibly comfortable. Even after five years of van adventures, my wife and I still say, “I can’t believe we have a shower inside our van—this is amazing!”
Tip 2 – Faucet On/off
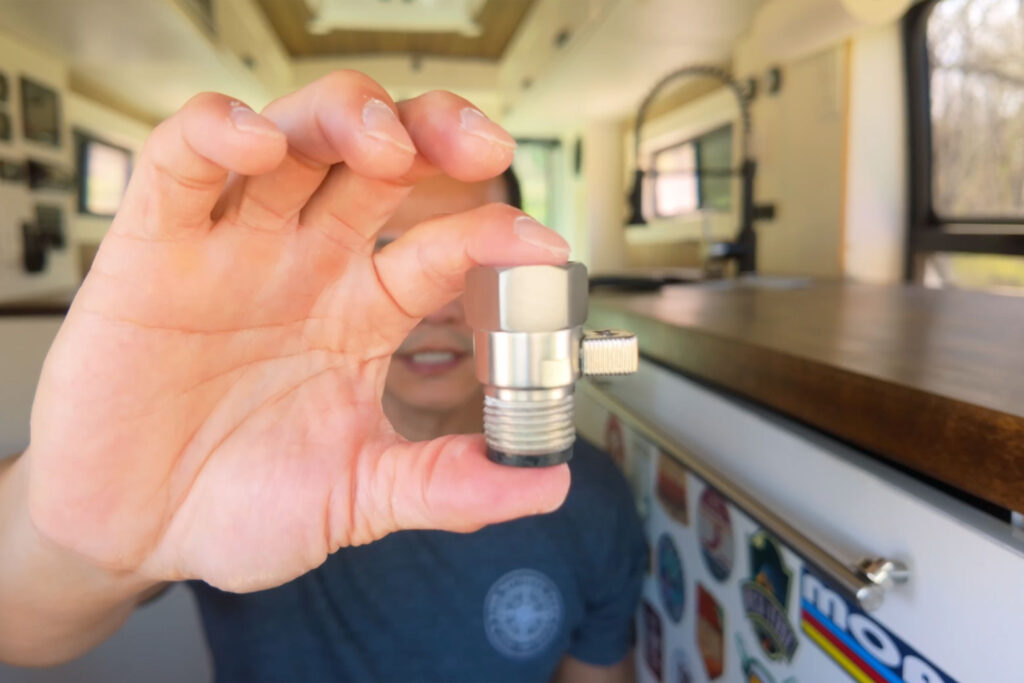
When traveling in a van, water is a limited resource, so every drop counts. That’s why this simple yet effective gadget can make a big difference—it helps you save water and makes showering much more convenient.
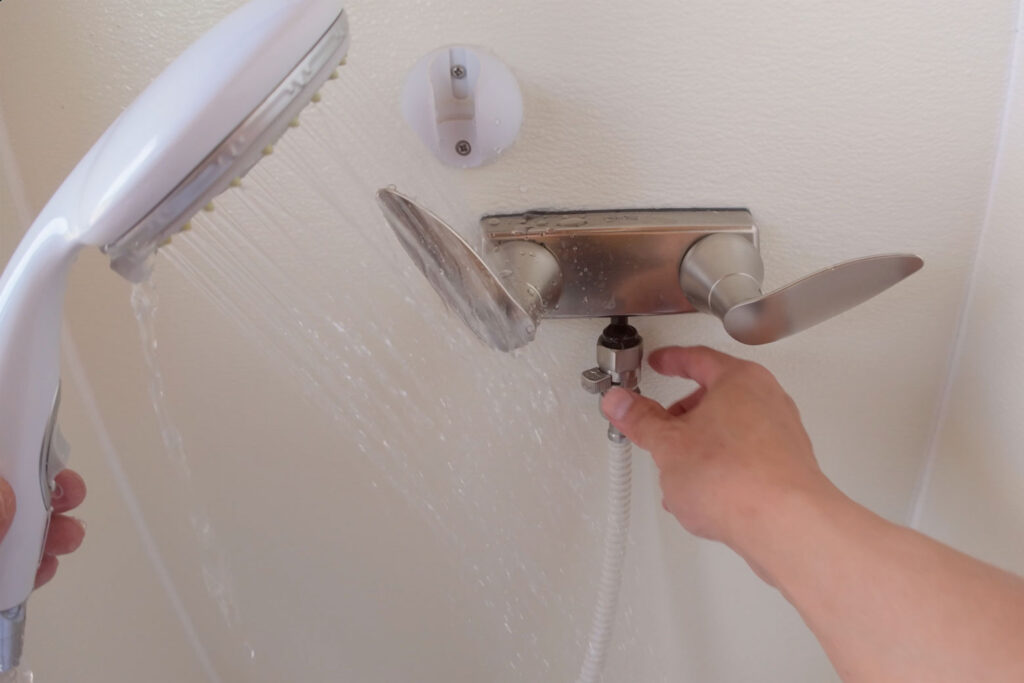
At first, an on/off valve for the faucet might sound unnecessary, but trust me, it’s a game-changer. It allows you to lock in your preferred water temperature, so when you turn the water off and back on, it stays exactly the same. No more wasting water while adjusting the temperature every time! Plus, it gives you full control over water flow, letting you adjust it from a gentle trickle to full pressure with ease.
A small upgrade, but a huge improvement for van life!
Tip 3 – Movie Projector
Who doesn’t love a little luxury while roughing it in the great outdoors? One of my favorite things to do when traveling solo is watch horror movies while camping. Sure, I could watch on my iPhone or iPad, but using a movie projector takes glamping to a whole new level.
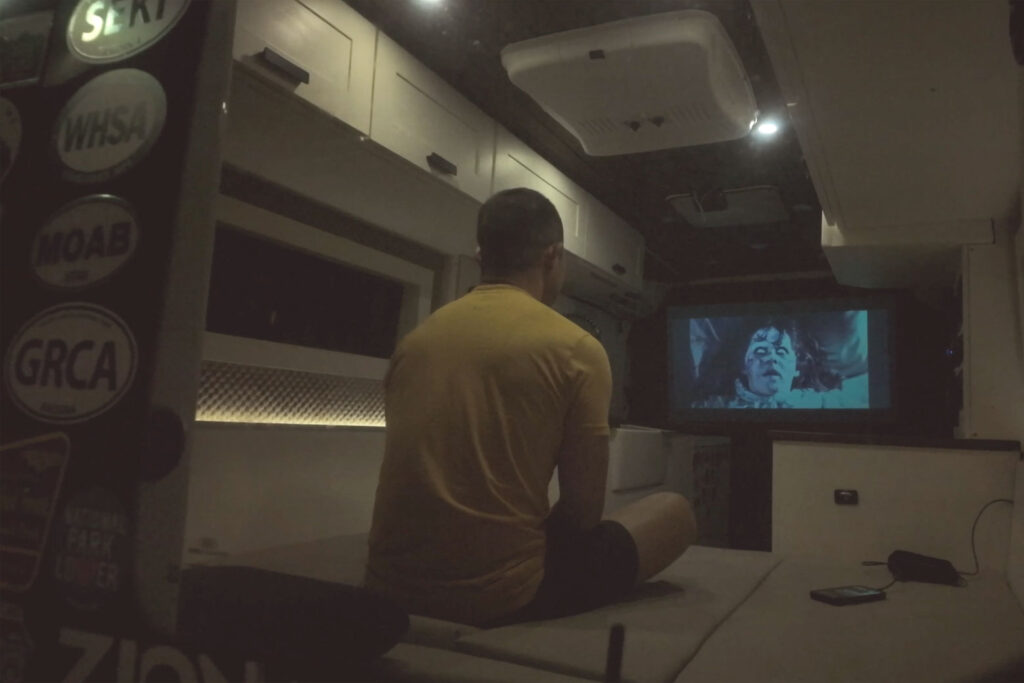
Installing one is super simple—it just requires a bit of pre-planning during the build process. All you need is an HDMI cable pre-wired into the ceiling and a blank surface to project onto. This could be a wall, window covering, or even a curtain—even a darker surface works surprisingly well. The HDMI connects to a Lightning adapter, allowing us to stream anything from an iPhone or iPad, with the audio playing through the van’s Bluetooth stereo for an immersive movie-night experience.
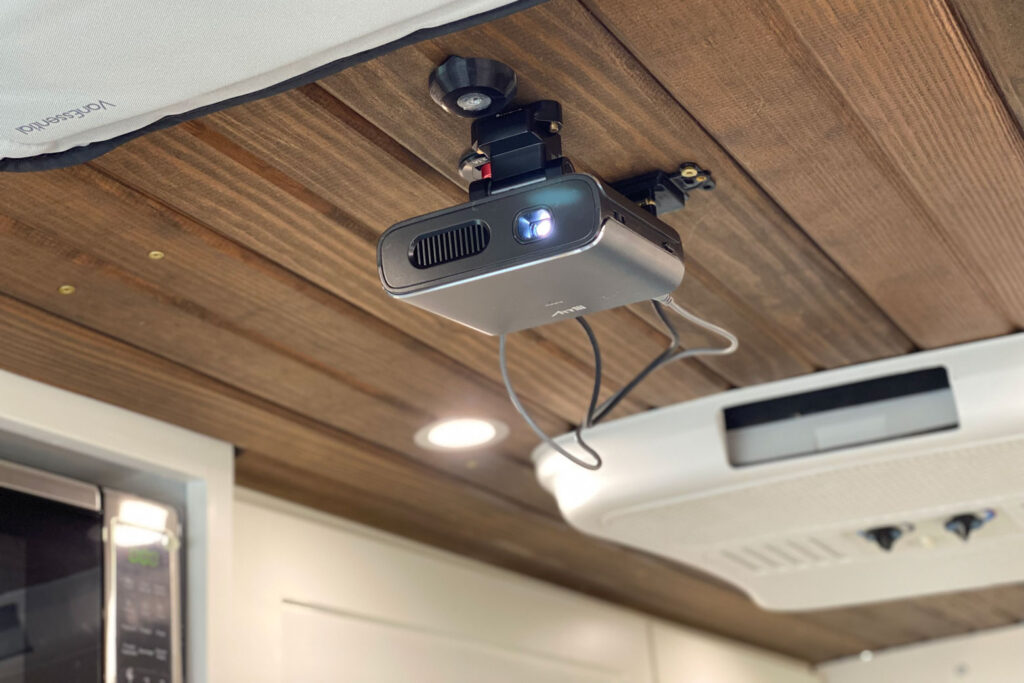
Movie night under the stars? Yes, please!
Tip 4 – Magnetic Latches
I’m not sure why, but I love smart gadgets that use magnets. There’s just something so satisfying about them! These magnetic buckles are a perfect example—we’ve installed them on all our blinds for effortless opening and closing.
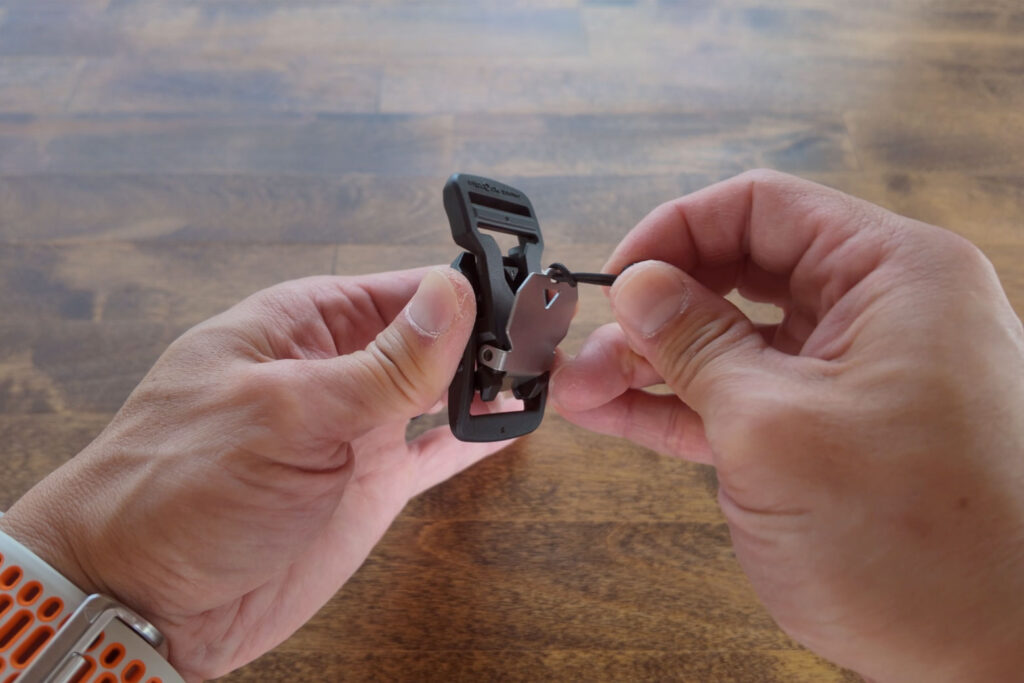
Here’s how they work: a magnet on one side snaps the buckle together, and once connected, the magnet locks it in place. To open, simply pull the tab to unlock and disengage—quick, easy, and hassle-free. These buckles save us a ton of time when rolling and unrolling the blinds, making van life just a little smoother.
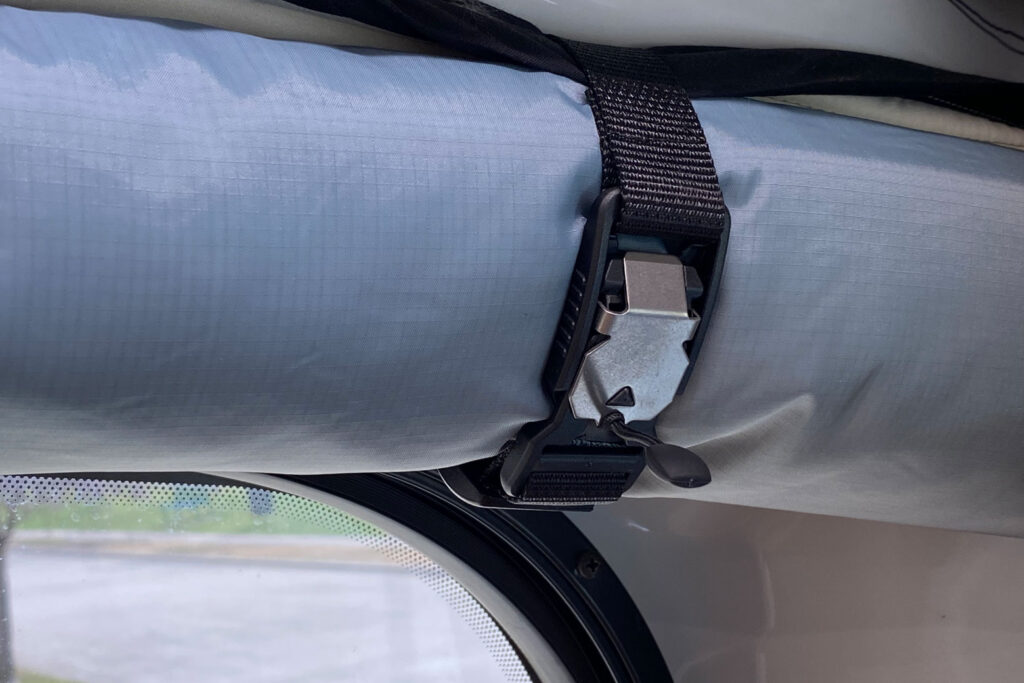
Tip 4.5 – Insulated Blinds
This fabric, made by The Warm Company, is designed to reduce heat loss by up to 80% and block up to 79% of solar heat gain! While I don’t have a scientific way to measure those exact numbers, I can tell you firsthand—it definitely works.
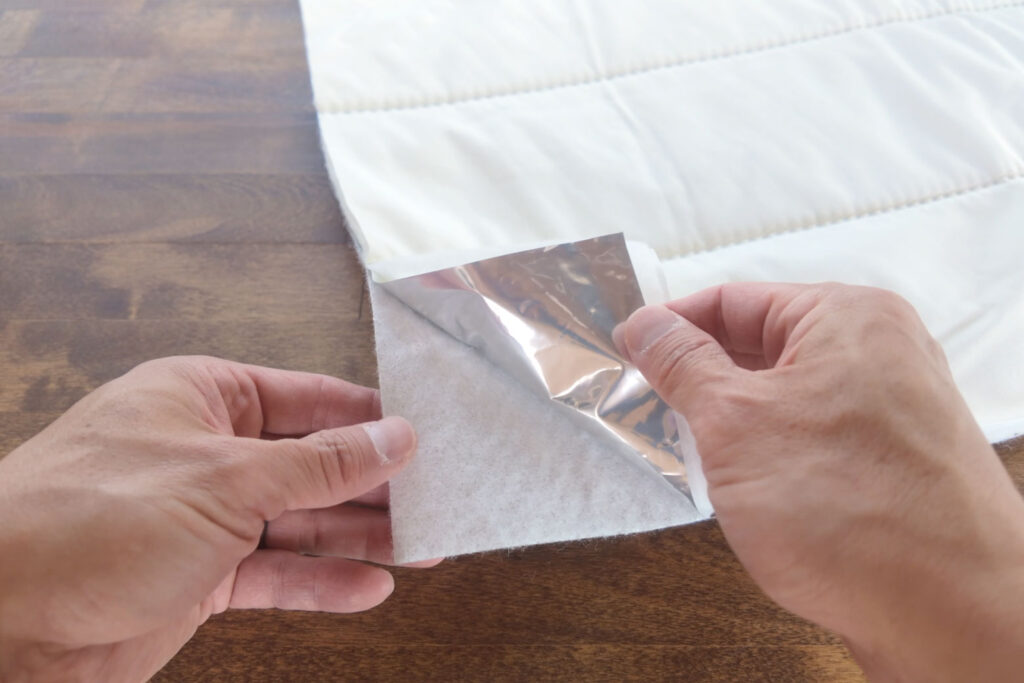
This fabric is made with five layers for maximum insulation and light blocking. It originally comes with four layers—white cotton, insulation, mylar, and another layer of insulation. To customize it for our van, we added a fifth layer of grey ripstop nylon to match the rest of our van.
Take this window, for example. In the summer, when the sun is beating down on it, the glass gets blazing hot. With the blind closed, it feels completely fine, but the moment I open it, it’s like opening an oven door—you can instantly feel the heat rush in. The same goes for winter. Open the blind, and it’s like cracking open a freezer—the cold hits you right away.
This fabric makes a huge difference in keeping the van comfortable year-round!
Tip 5 – Quick Disconnect
When we arrive at our campsite, I’m always the one in charge of setting up the van and handling all the hookups. That’s why I’m all about anything that makes the process quicker and easier.
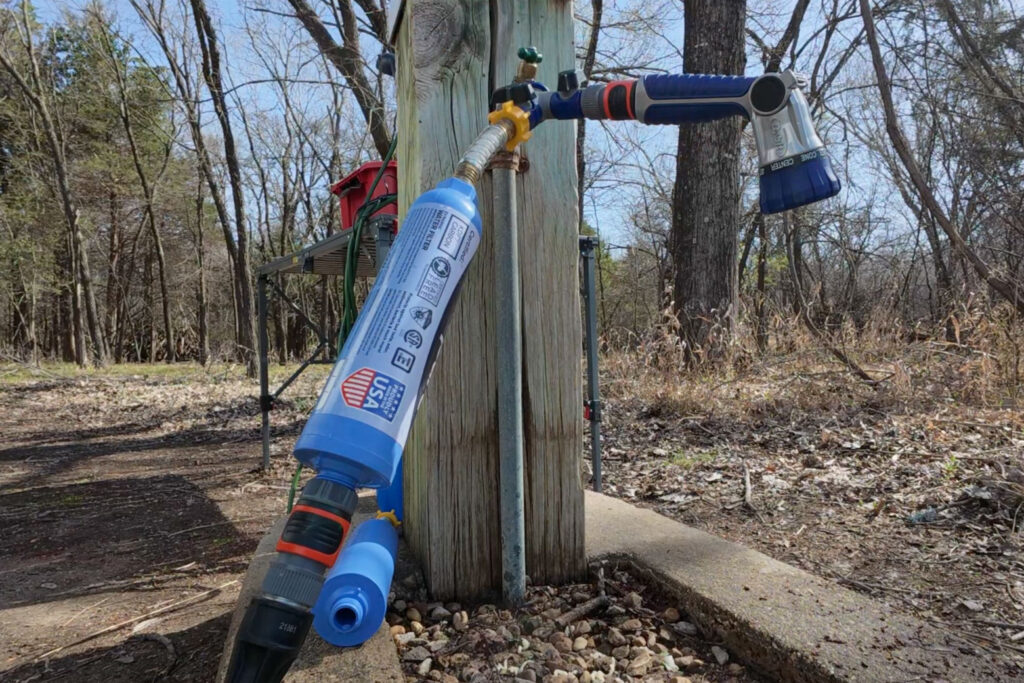
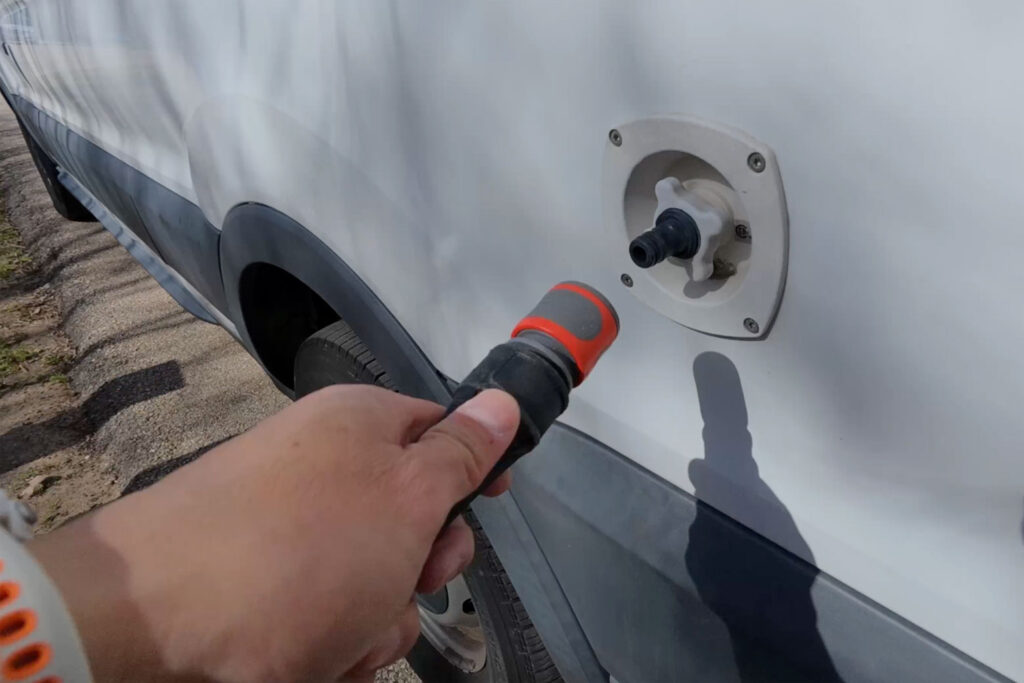
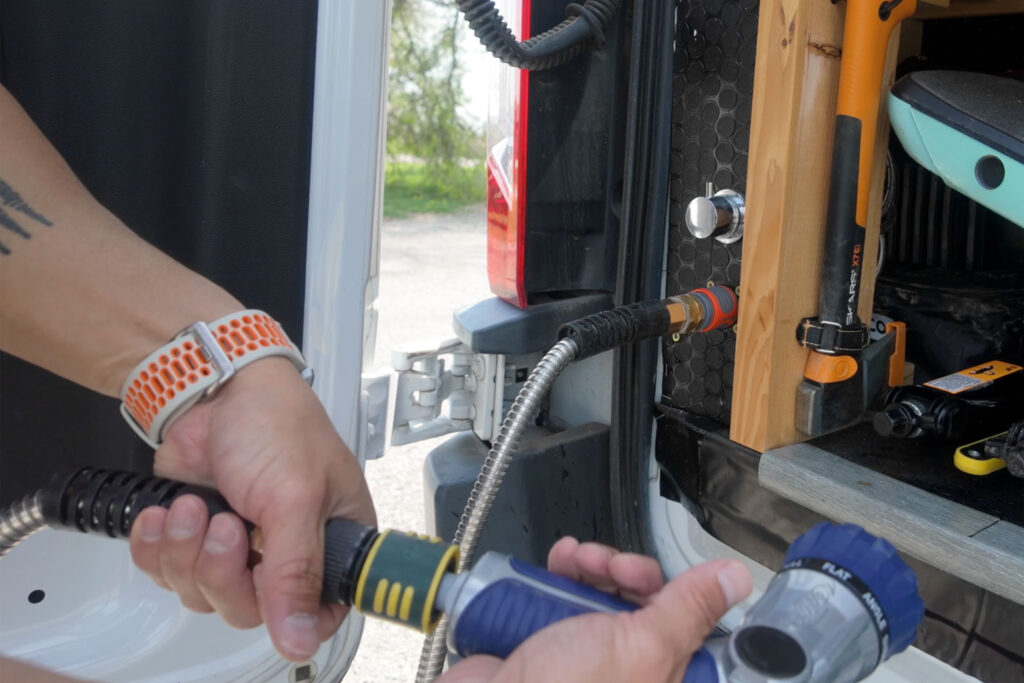
One of my favorite upgrades? Quick disconnects—I’ve installed them on everything. They’re incredibly easy to use and save a ton of time, making setup and breakdown way more efficient.
Tip 6 – Add AC
We live in Texas, where summer temperatures regularly top 100°F, so having air conditioning is a must. And before you say, “AC while camping? Really?”—hear me out.
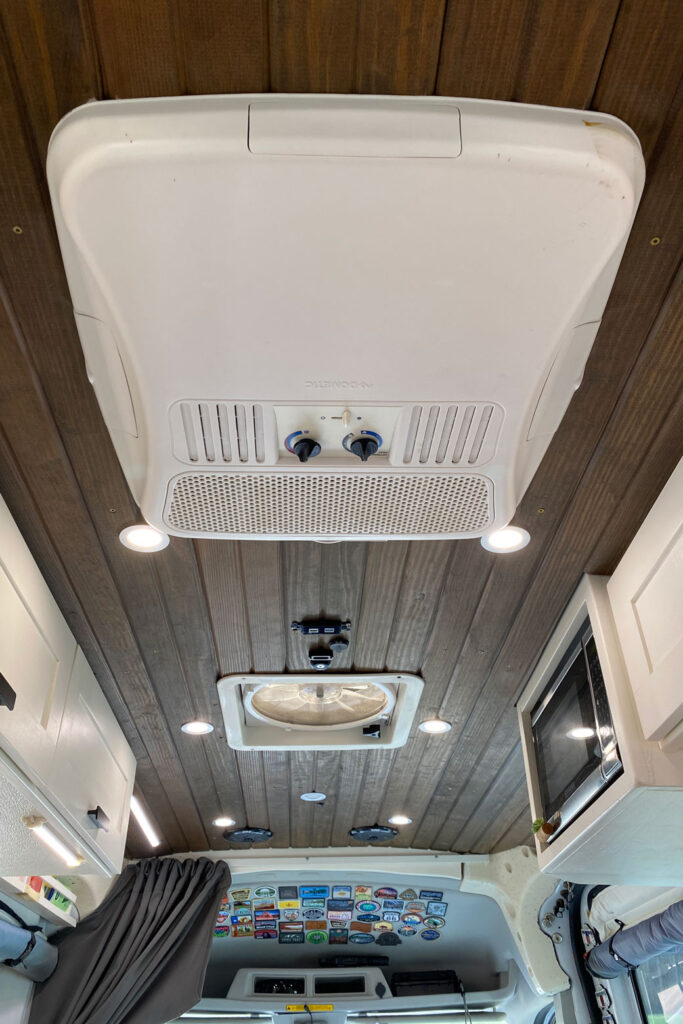
Why are you building or traveling in a van in the first place? For comfort. Otherwise, you’d just sleep in a car or a tent, right? So if you’re designing your van to be more comfortable, why wouldn’t you include AC?
But it’s not just for hot summer days—these Dometic AC units also offer an optional heat strip, making them just as useful in the winter. We’ve camped in 30-degree weather, and thanks to the heater, we stayed toasty and warm all night.
I’ll never forget our trip to Zion National Park a couple of years ago. It was a scorching 110°F, and on the first night, we couldn’t get an electric site—so no AC. It was hot, muggy, and nearly impossible to sleep. Thankfully, on the second night, we secured an electric site and ran the AC—what a difference! It turned a miserable night into a comfortable and enjoyable one.
Trust me—AC in a van is worth it.
Tip 7 – Electric and Water Sides
This next tip is for anyone currently in the van build planning phase: separate your van into an electric side and a water side. Doing so will make your build a lot easier, as you won’t have to run electrical conduit or water hoses from one side of the van to the other.
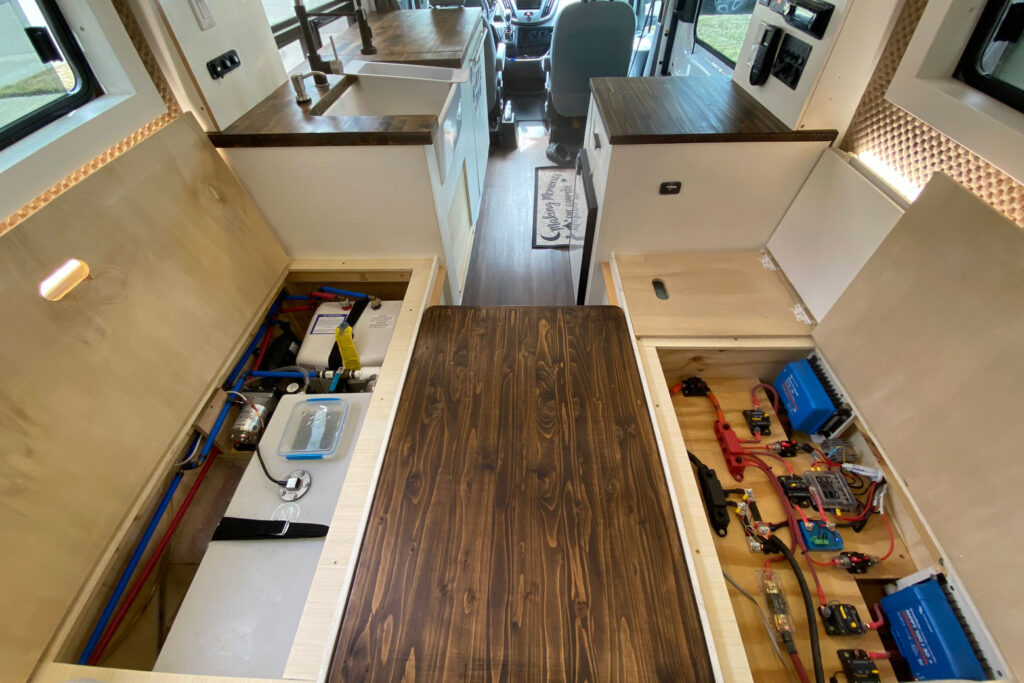
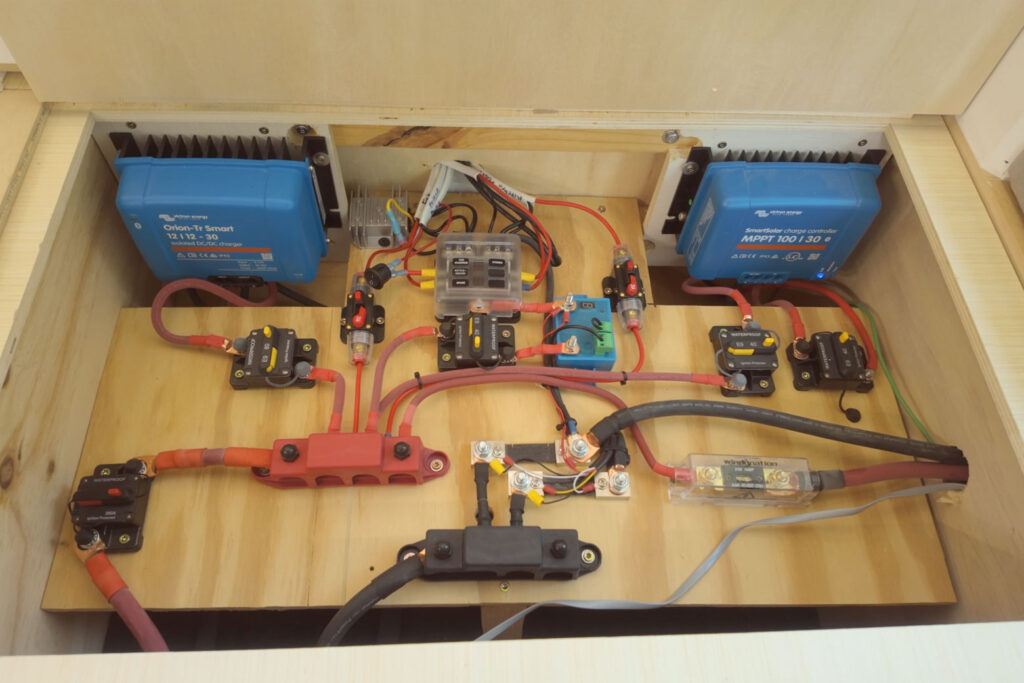
On the electric side, we’ve placed most of the electrical components: the solar charger, DC-to-DC charger, battery, fuses, refrigerator, stereo, security system, control panel, and shore power plug.
On the water side, you’ll find the fresh water tank, pump, heater, sink, shower, and both grey water and fresh water hookups.
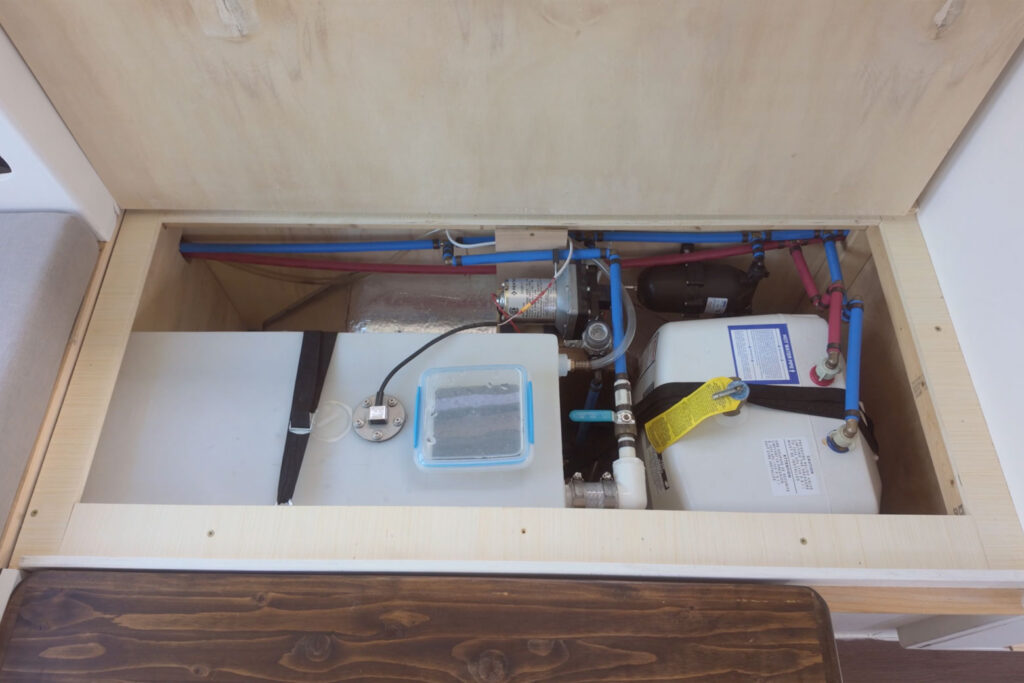
We did have to run a small conduit under the floor to power things like the water pump, water meters, lights, USB chargers, and other small electrical devices, but overall, keeping the systems separate has streamlined everything.
When building a van, a lot can go wrong. Simplifying your design is key to reducing the chances of complications and ensuring a smoother build process.
Tip 8 – USB Chargers Everywhere
Install USB chargers everywhere. We have 17 USB ports in our van, and we use every single one of them.
Installing a USB charger is super simple—just run a wire and plug it into a 12V source, and you’re good to go.
So, my advice? Add a USB wherever you think you’ll need it. Trust me, you’ll find yourself using them more than you think!
Tip 9 – No See Um Mesh
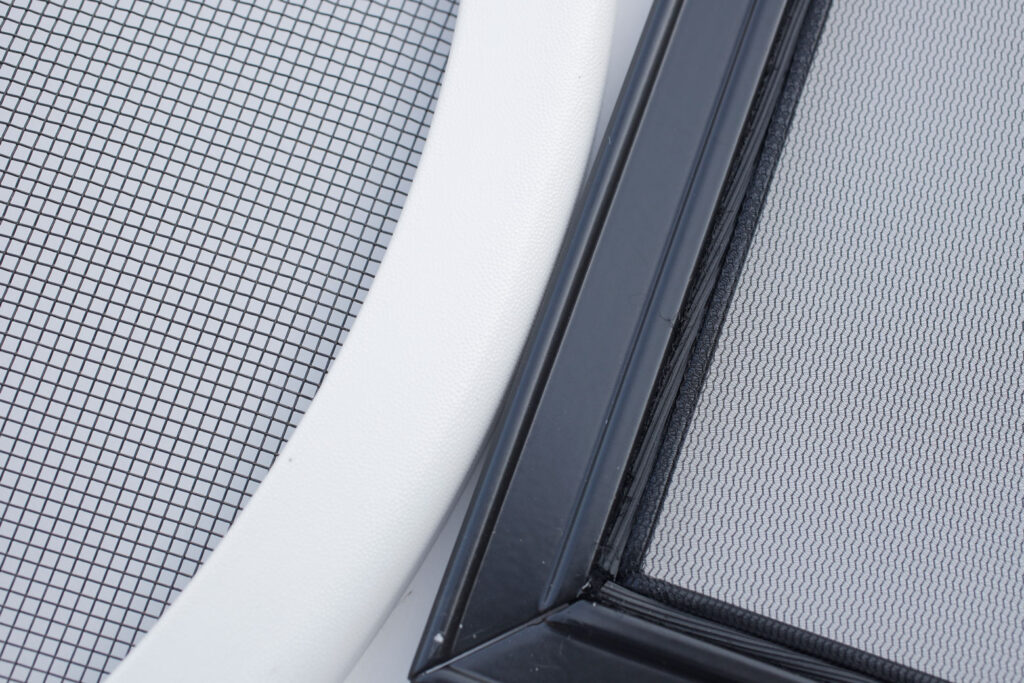
Have you ever camped in the summer and noticed that bugs swarm around the lights inside the van, even though the doors are closed? Chances are, those tiny bugs are getting in through your window screens. Standard mesh has relatively large gaps, so small bugs can slip through—especially if you have the fan exhausting air out, which can draw bugs in through the mesh.
To fix this, replace the standard mesh with “no-see-um” mesh. The holes in this mesh are about half the size of regular mesh, effectively keeping out even the tiniest bugs. Ever since we swapped out all our window screens for no-see-um mesh, the only bugs that get inside are the ones that sneak in when we open the doors.
If you found this post helpful, it would be super cool if you purchased the components from my Amazon links. It costs you nothing but we make a teensy weensy commission off your purchases. Your support helps our little family stay on the road so we can share our adventures with you. Thanks in advance, we greatly appreciate it 🙂

2 Responses
Hi! I love the projector idea! What is the detachable base/ ceiling mounting plate that you are attaching it to?
Hi Gayla, these are the items I used for a quick attachment.
Baseplate
Projector Mount
Let me know if you have any other questions.
Thanks!